How to Change iTunes Backup Location
It is essential to change iTunes backup location on your Windows or Mac system to create free space or memory for the efficient running of your computer. Since iTunes stores iOS data app files, camera roll photos, settings, etc. from the iPhone, iPad or iPod which can continuously grow and fill up the entire C Drive.
Below are ways to change the directory or save to external memory on a Windows and Mac system.
Windows
You can change iTunes backup location on your Windows PC manually and automatically. Here are the processes:
Sponsor Ads:
Gihosoft iPhone Data Recovery is a professional iPhone Data Recovery software to get back all your lost text message, photo, video, call history, note, contact and more from iPhone/iPad/iPod Touch. It offers a full solution to recover your lost data in different tough situations. Besides recovering data directly from iPhone, iPad and iPod touch, it also allows you to recover data from iCloud and iTunes backup files. What's more, it supports Smart Recovery modes that can find your iPhone data quickly.
1. Manually Change iTunes Backup Location
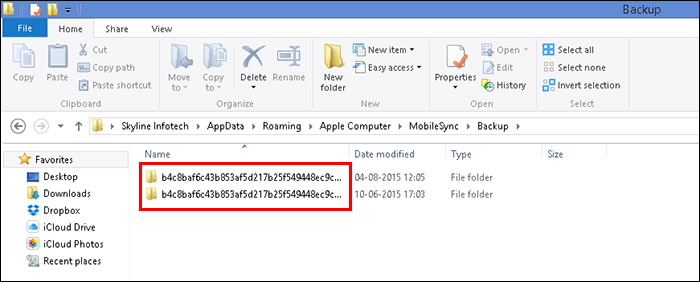
Step 1: Find your recent iTunes backup folder on Windows 8, 7, or Vista, click Start Menu and enter the following in the search box to locate iTunes folder: %APPDATA%\Apple Computer\mobileSync
Step 2: Move the current iTunes’s folder to a new location probably a new drive using the simple drag-and-drop. Having copied or moved the folder, you can now delete the original copy on the C Drive. Alternatively, select the iTunes folder and cut using Control + X, click the new folder you where you want move it to by right-clicking on your mouse →Select New Folder→ Rename it →Paste using Control + V.

2. Automatically Change iTunes Backup Location
Step 1: Download and install CopyTrans Shelbee application. It is compatible with Windows 10, 8, 7, Vista, and XP.
Step 2: Close iTunes and launch CopyTrans Shelbee. Click on “Toolbox” and open it.
Step 3: Click on the new pencil symbol to select a new location for iTunes backup folder (possibly on another drive).
Step 4: Select the folder and click Ok.
Step 2: Close iTunes and launch CopyTrans Shelbee. Click on “Toolbox” and open it.
Step 3: Click on the new pencil symbol to select a new location for iTunes backup folder (possibly on another drive).
Step 4: Select the folder and click Ok.

Step 5: Click “Start”.
Step 6: Wait until CopyTrans Shelbee finishes changing the backup folder to the new destination.
Step 7: After the location has been changed successfully, you could see a message pop up. And that is all about changing the backup location.
Step 6: Wait until CopyTrans Shelbee finishes changing the backup folder to the new destination.
Step 7: After the location has been changed successfully, you could see a message pop up. And that is all about changing the backup location.
Mac
Here are the steps to change iTunes backup location on Mac.
Step 1: Download, install and launch iMazing .
Step 2: Select your device in the sidebar.
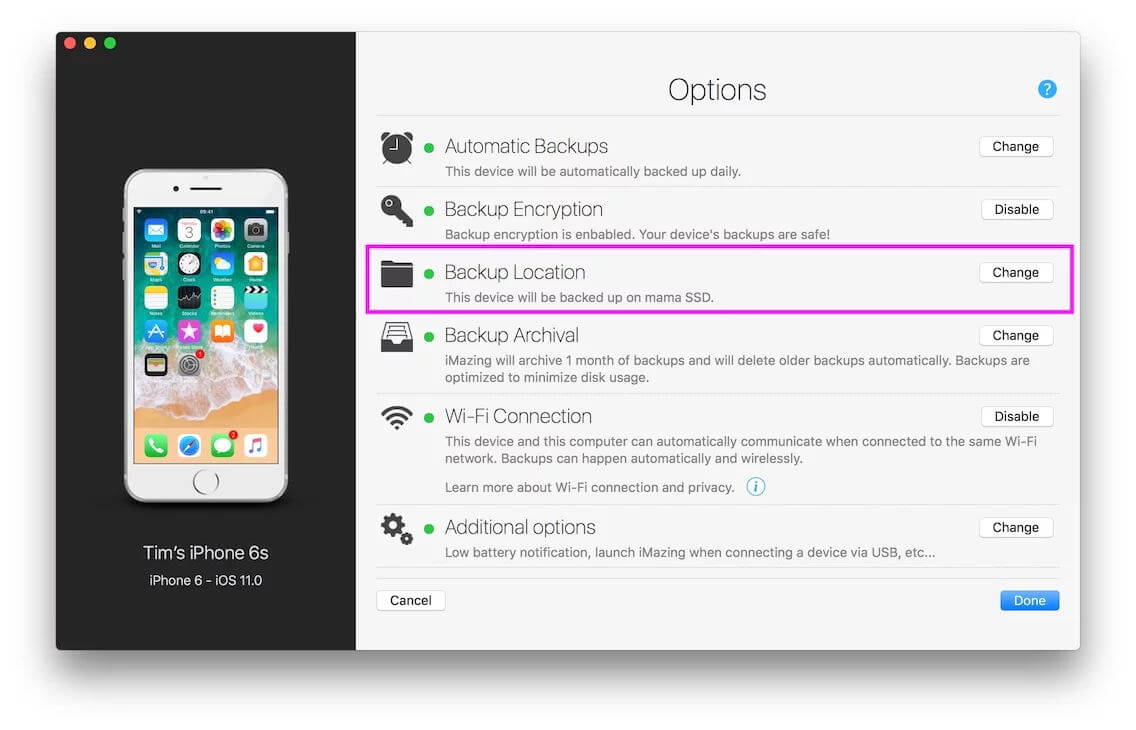
Step 3: In the main window, click the cogwheel icon to open Device Options window.
Step 4: Click “Change Backup Location”.
Step 2: Select your device in the sidebar.
Step 3: In the main window, click the cogwheel icon to open Device Options window.
Step 4: Click “Change Backup Location”.

Step 5: Choose a new custom location to choose any folder you created for this purpose.
Note
1. If you are launching iMazing for the first time, it will display backup location options.
2. The backup location will only affect future backups to the new location.
2. The backup location will only affect future backups to the new location.
No comments:
Post a Comment